Tuesday, 11 December 2018

I had to prepare rather quickly for my class last week and I had ordered this new stamp set but hadn't used it as yet.  I fell in love with the bow, it looks so realistic when stamped onto cardstock giving the appearance of a 3D card on one layer. really is so very pretty.

I'm amazed at how versatile the Stamp Set is too. From the one stamp set I created a Sympathy Card, a Christmas card, Just a Note card, a Wishing You Well and I left one blank so I could quickly add an appropriate sentiment should I need a card quickly.

 These are the proto types I designed for my class to make and guess what, everyone who used the Stamp Set also fell in love with the bow and ordered a Stamp Set each.


The stamp set used is Wishing You Well and it can be found in the Autumn Winter Catalogue so if you want to get your hands on this set get it now as it may not be available after the end of December 2018. The product number is 147864
 

Thursday, 29 November 2018

I've been busy busy busy sewing and knitting this week. I got two more unfinished projects done. Two Christmas cushions which I've embroidered using a Jacobean style alphabet. I've done 'Joy' and 'Noel' but would like to do two more before Christmas. I've already programmed them ready to go but they take all afternoon to stitch out. I have to sit close by as there are so many thread changes, plus the minute I'm not looking at the machine it stops, either the thread breaks or the spool runs out or some other malfunction. I think I have a gremlin living inside the machine that watches for me leaving the room then it strikes.  I'll hopefully find some time to stitch out a 'Merry' and a 'Jolly'. I'll get my knitting out and do that whilst I watch my machine work it's magic. I hope you like these two anyway. I'll post photos of the next two if I get them done amidst the Christmas hype and rush.


Saturday, 24 November 2018

At last I've completed my heirloom quilt project.
Each block is embroidered with a different design. Also each block showcases a newly learned tecnique such as ...smocking, intarsia and waterfall to mention 3 and before you ask it has cost in excess of £200 to create including classes and materials but not man hours as that would render it priceless.


Tuesday, 13 November 2018

Wow, what a lot has happened in the last month. I've been mega busy but not enough crafting!!! Although I did have a fabulous weekend of crafting on a retreat in North Yorkshire at an old Manor house that is now a Hotel. My room was none other than the late Duke and Duchess of Rutland's former boudoir. I could've held a ball in that room it was so big. We made loads of Christmassy projects some of which I'll share when I've had chance to catch my breath and upload. For now though I'll share a couple of projects I've been working on at home.

I love the effect of this Christmassy village. It completely changes the mood with different coloured lights. I love this effect with green lights left over from Halloween. It folds completely flat so fits nicely in an envelope for mailing. Fab idea for Christmas cards. Message me if you'd like details on how to order one.


I have also been working on a Christmas Card that lights up too. I can't show the front as I don't want to spoil the surprise should the recipient see this blog.  I love how it's turned out - a lot of work but worth it I think.


I am going to spend the next few weeks trying to complete some of my UFO's. As I get them done I'll post on here for you to see. Currently I'm working on an Heirloom Quilt I've been putting together for over a year now and I think it's time to get it done and finished. Watch this space. hahaha.  Till next time stay calm and keep crafting. 

Thursday, 4 October 2018

Here's my latest project. I did this on a circular needle with Continental style knitting and taught myself how to knit intarsia with one colour wool in one hand and the second colour in the other hand. I also learned how to catch the floats on the inside. An intriguing process which I enjoyed so much that I'm now knitting a second hat but reversing the colours.

Sunday, 23 September 2018

Gorgeous little Flip Album

What fun I had creating this gorgeous little flip album. I was inspired by a video I saw by Jen of Eve. I took her idea and then came up with my own size and ideas for the inserts.


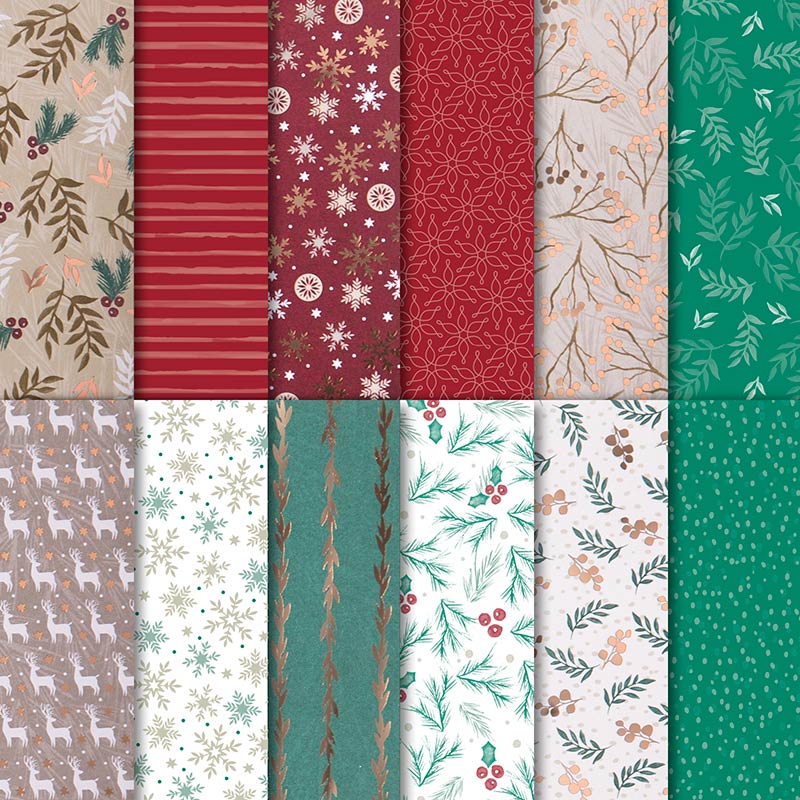
It's great for using up all those bit and bobs you have left over from other projects, and if you keep all the scraps from one set of Stampin' Up Designer Series Papers together, to use, you can guarantee everything will just match up together perfectly.


***WARNING***

These flip albums are addictive - once you get started you keep adding a page here, a page there, a tag, a ribbon, a bow, a flower - you get my drift?? You just want to keep on adding stuff and it get's fatter and fatter. I suppose the best thing would be to make the box last and you can make it big enough to fit all your pages and embellishment in it.
 

 I just made this off the cuff so I didn't record any measurements but if enough people are interested I can easily come up with some instructions.  I'm thinking I might do this as a full day workshop in November and make it Christmas themed so watch this space.

 
 You can find me on facebook at Cathie Marie Creations  


And you can watch the video on  my YouTube Channel


I will come back and list all the products I used and link them to my shop. If you would like to purchase any products I've used, I would really appreciate your custom and thank you in anticipation.


Thanks for taking the time to look. Please subscribe to my channel if you'd like to see what I do in the future, click on the bell if you would like a notification when I post any new projects and please give me a thumbs up if you enjoyed my video.

See you in the next video.

Hugs

Cathie x

Friday, 14 September 2018

Cute note card


Hello everyone and thank you for visiting my blog. I've created this lovely cute little square card, just for a change. It's really quick and easy to create. I've listed the materials you'll need to create this card along with the cutting dimensions for the cardstock and Designer Series Paper.  If you enjoy my tutorial please leave a thumbs up or a comment and if you'd like to be notified of any further tutorials please subscribe to my youtube channel.  Thank you and big hugs

Cathie Marie xx


You will need :-

Thick Whisper White cardstock measuring 21 cm x 11 cms  (8 1/4 inches x 4 1/8 inches), and scored at 11 cms (4 1/8 inches.)
Merry Merlot card stock measuring 10 cm x 10 cm (4 inches x 4 inches)
Joyous Noel Speciality Designer Series Paper measuring 9.5cm x 9.5cm  (3 7/8 inches x 3 7/8 inches)
Copper foil element cut with the largest circle framelit from the Spot of Tea Framelit Dies set
Whisper White label cut with largest label die from the Stitched Labels Framelits Dies set
Merry Merlot ink to stamp sentiment from Stitched All Around Stamp Set
Merry Merlot and Copper Ribbon to tie bow


Whisper White A4 THICK cardstock

Whisper White A4 Cardstock


Joyous Noel Specialty Designer Series Paper


Copper Foil Sheets

Stitched Shapes Framelits Dies


Spot of Tea Framelits Dies


Stitched All Around Stamp Set


Merry Merot ink pad


Merry Merlot A4 Cardstock


Merry Merlot and Copper Reversible Ribbon 

Saturday, 8 September 2018

Hello and welcome, I hope you have 10 minutes to spare to watch my latest tutorial where I can show you how to create a gorgeous cross stitch Christmas card without a strand of silk or a needle in sight.


Materials required

Card base = I used Old Olive measurements but you can choose whatever colour you prefer, cut a sheet of A4 cardstock in half so it measures are 21cm x 15cm or (8 1/4"   x   5 7/8"  inches)  and scored at  10.5cm  (4 1/8" inches)
Mat = I used Very Vanilla card stock measuring 9.5 cm x  14 cm  or (3  7/8 " x   5 5/8" inches)

Here's a list of the supplies I used to make these cards.  If you click on the links by each image it will take you to my online shop where you can see all the details and you can order from that link if you wish to purchase any of these products to make you very own Christmas cards.


all is bright A4 cardstock pack


clear embossing powder


mini glue dots


granny apple green stampin pad


Heat Tool


multipurpose liquid glue


stamparatus


cross stitched Christmas stamp set


shaded-spruce classic stampin pad


real red satin ribbon


real red classic stampin pad


whisper white A4 cardstock


stitched labels framelits dies


versamark pad